Spektral is a desktop app. Everything it produces — tokens, specs, components, stories — is written to a folder on your machine that you own and can commit to git. First run takes about two minutes.
Before you start
You need Node.js and npm on your machine. Spektral scaffolds a real npm package for each platform you target and installs its dependencies, so it checks for both when you create a project and tells you if either is missing.
You do not need to be a developer to use Spektral, and you do not need an account to try it.
Install the app
- Download the build for your machine
Grab the installer from the download page. macOS is fully supported (separate Apple Silicon and Intel builds, macOS 12 or later). Windows and Linux builds are available and experimental during the beta.
- Install and open it
On macOS, open the
.dmgand drag Spektral to Applications. On Windows, run the.exeinstaller. On Linux, mark the AppImage executable and run it. - Accept the terms
The first launch shows the terms of service. Press I agree to continue. This is asked once per machine.
Choose how you generate
Spektral builds components with an AI agent, and the next screen asks where that model runs. There are two answers, and you can change your mind later in Settings.
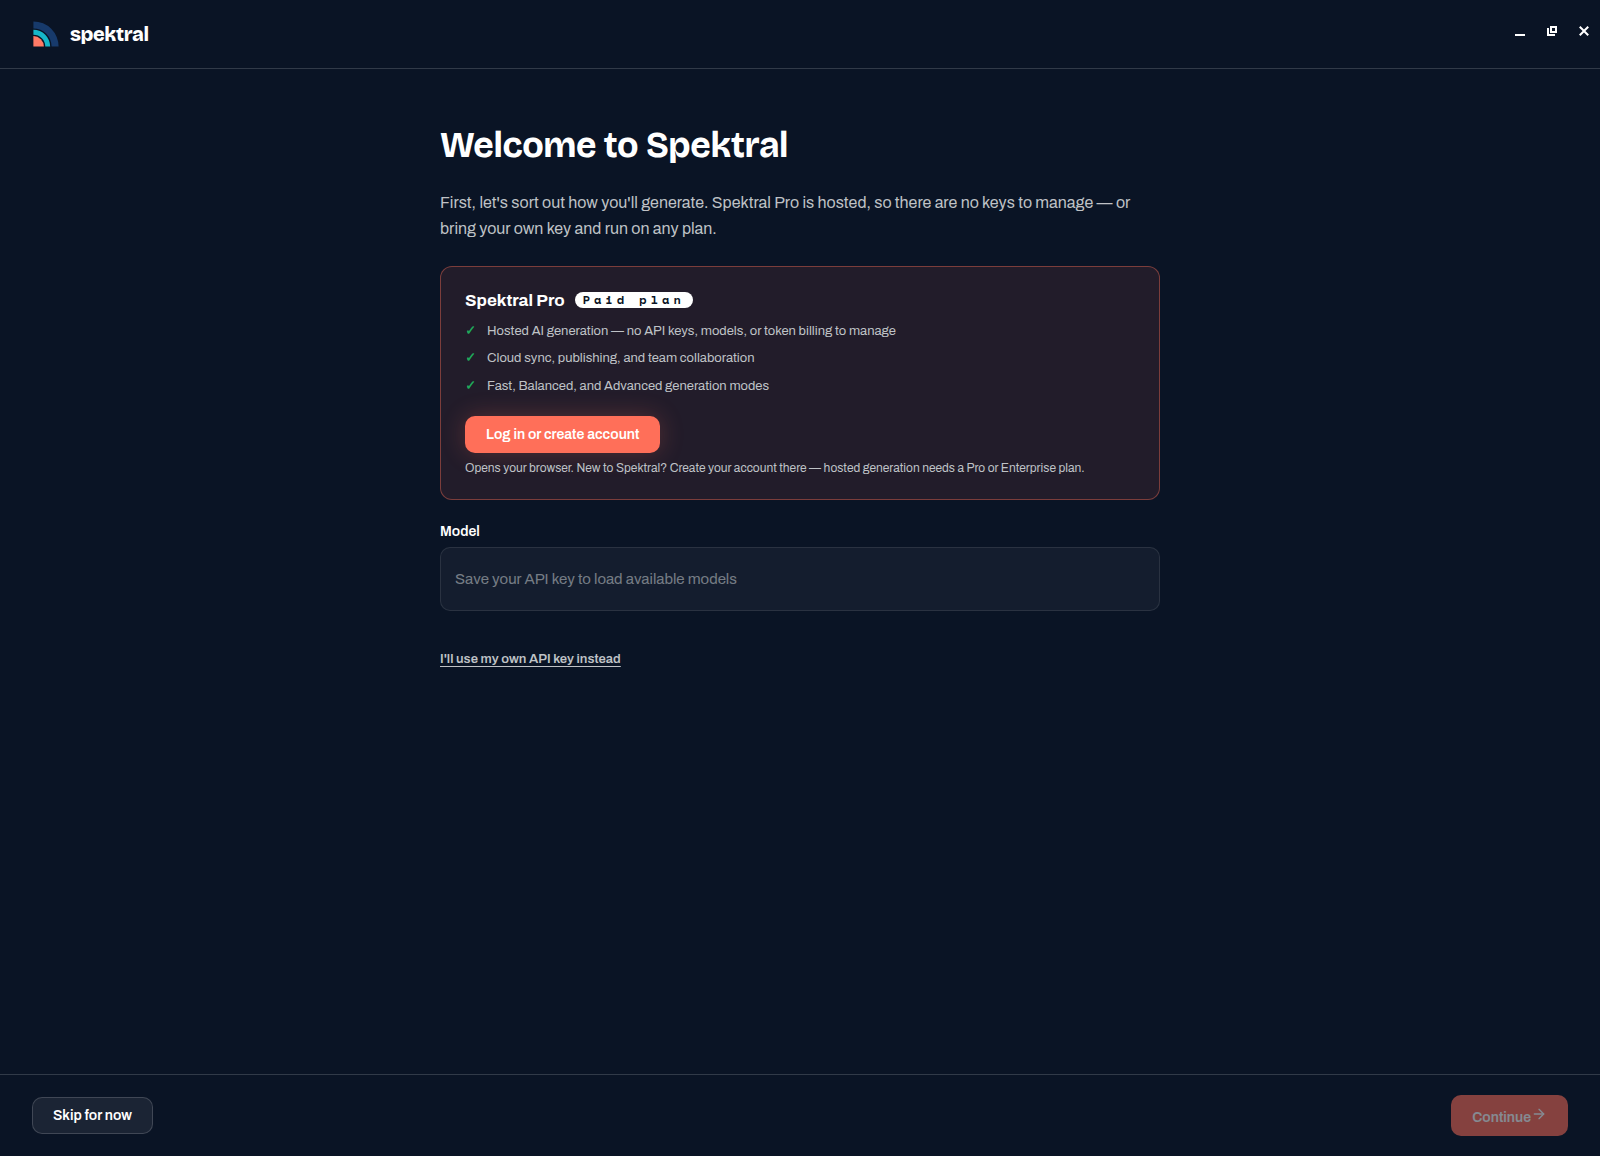
- Spektral Pro — hosted
Press Log in or create account. Your browser opens, you sign in, and the app picks the session up. There are no keys, models, or token bills to manage, and it is the option that also unlocks cloud sync, team collaboration, and publishing.
- Bring your own key
Choose I'll use my own API key instead to run generation against your own account. Pick Anthropic Claude and paste a Claude key, or pick OpenAI Compatible for OpenAI, Azure OpenAI, Ollama, LM Studio, or any other endpoint that speaks the same API. Press Save key and the model list fills in; choose a model and continue.
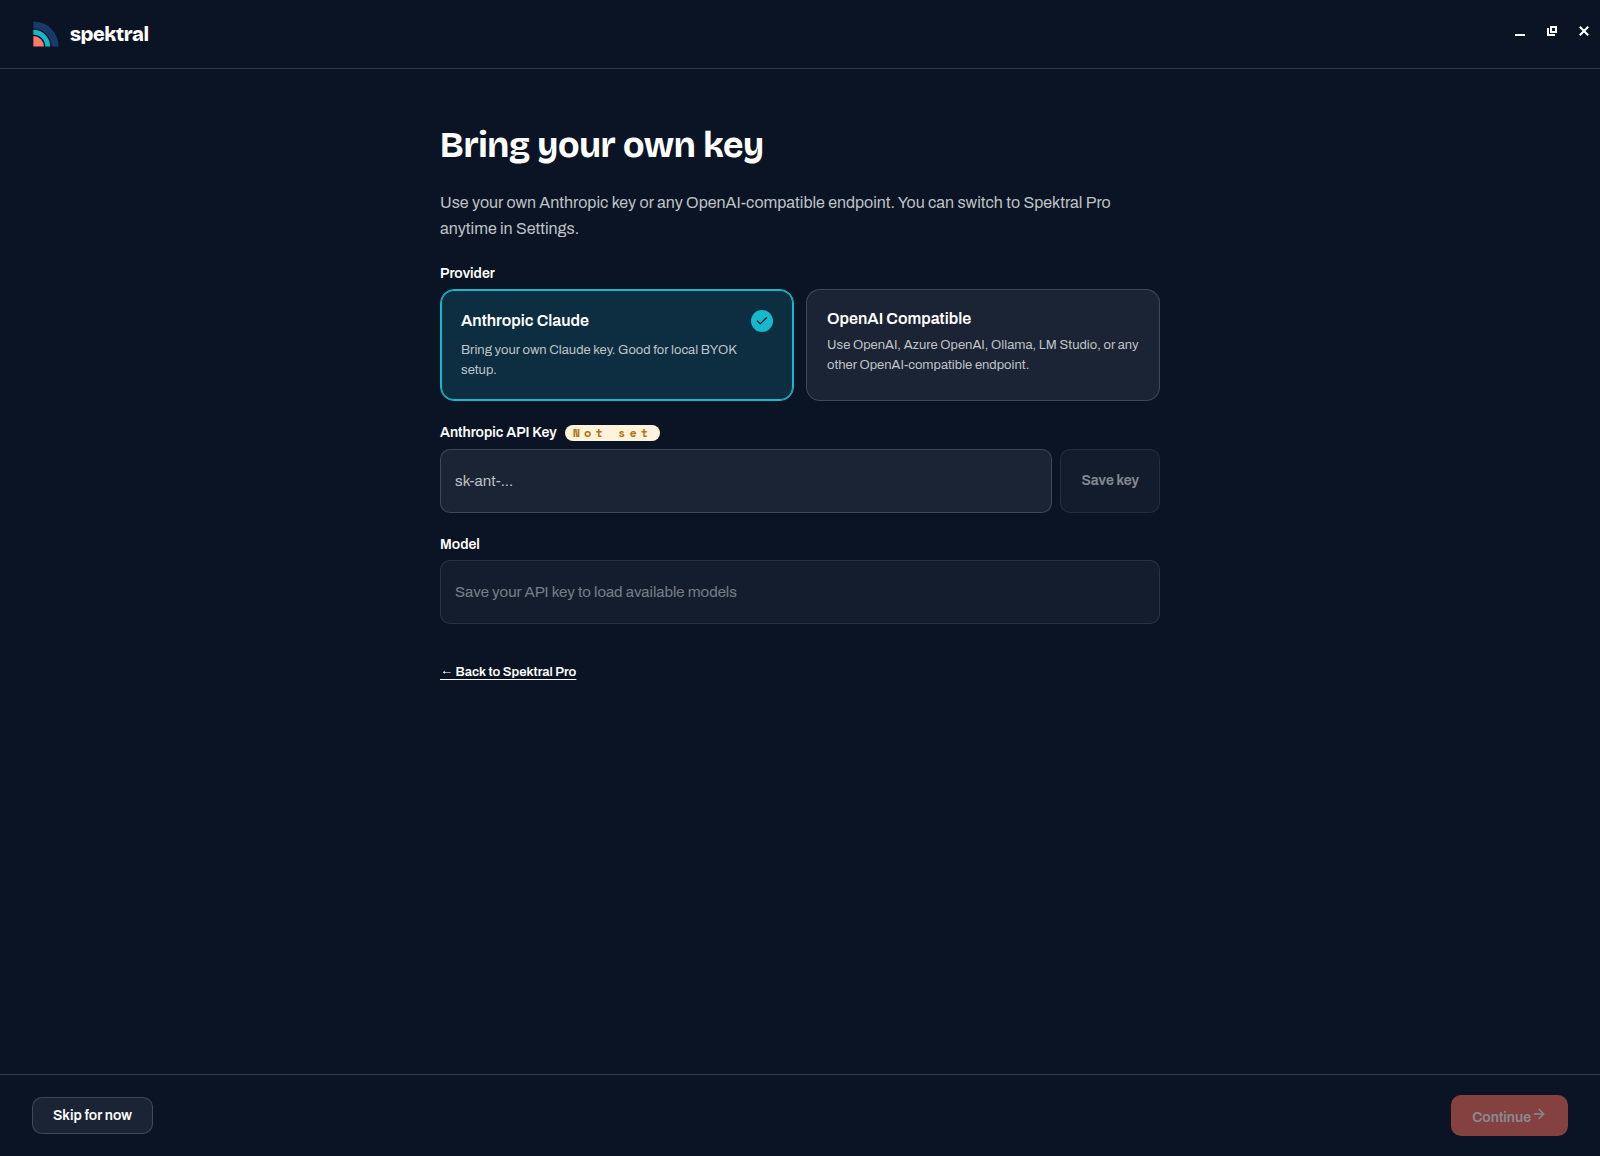
Keys are stored by the app's main process and are never exposed to the interface. - Or skip it
Skip for now takes you straight into the app. You can create projects, browse and edit tokens, read specs, and run Storybook without a model — you just cannot generate until you come back and set one up.
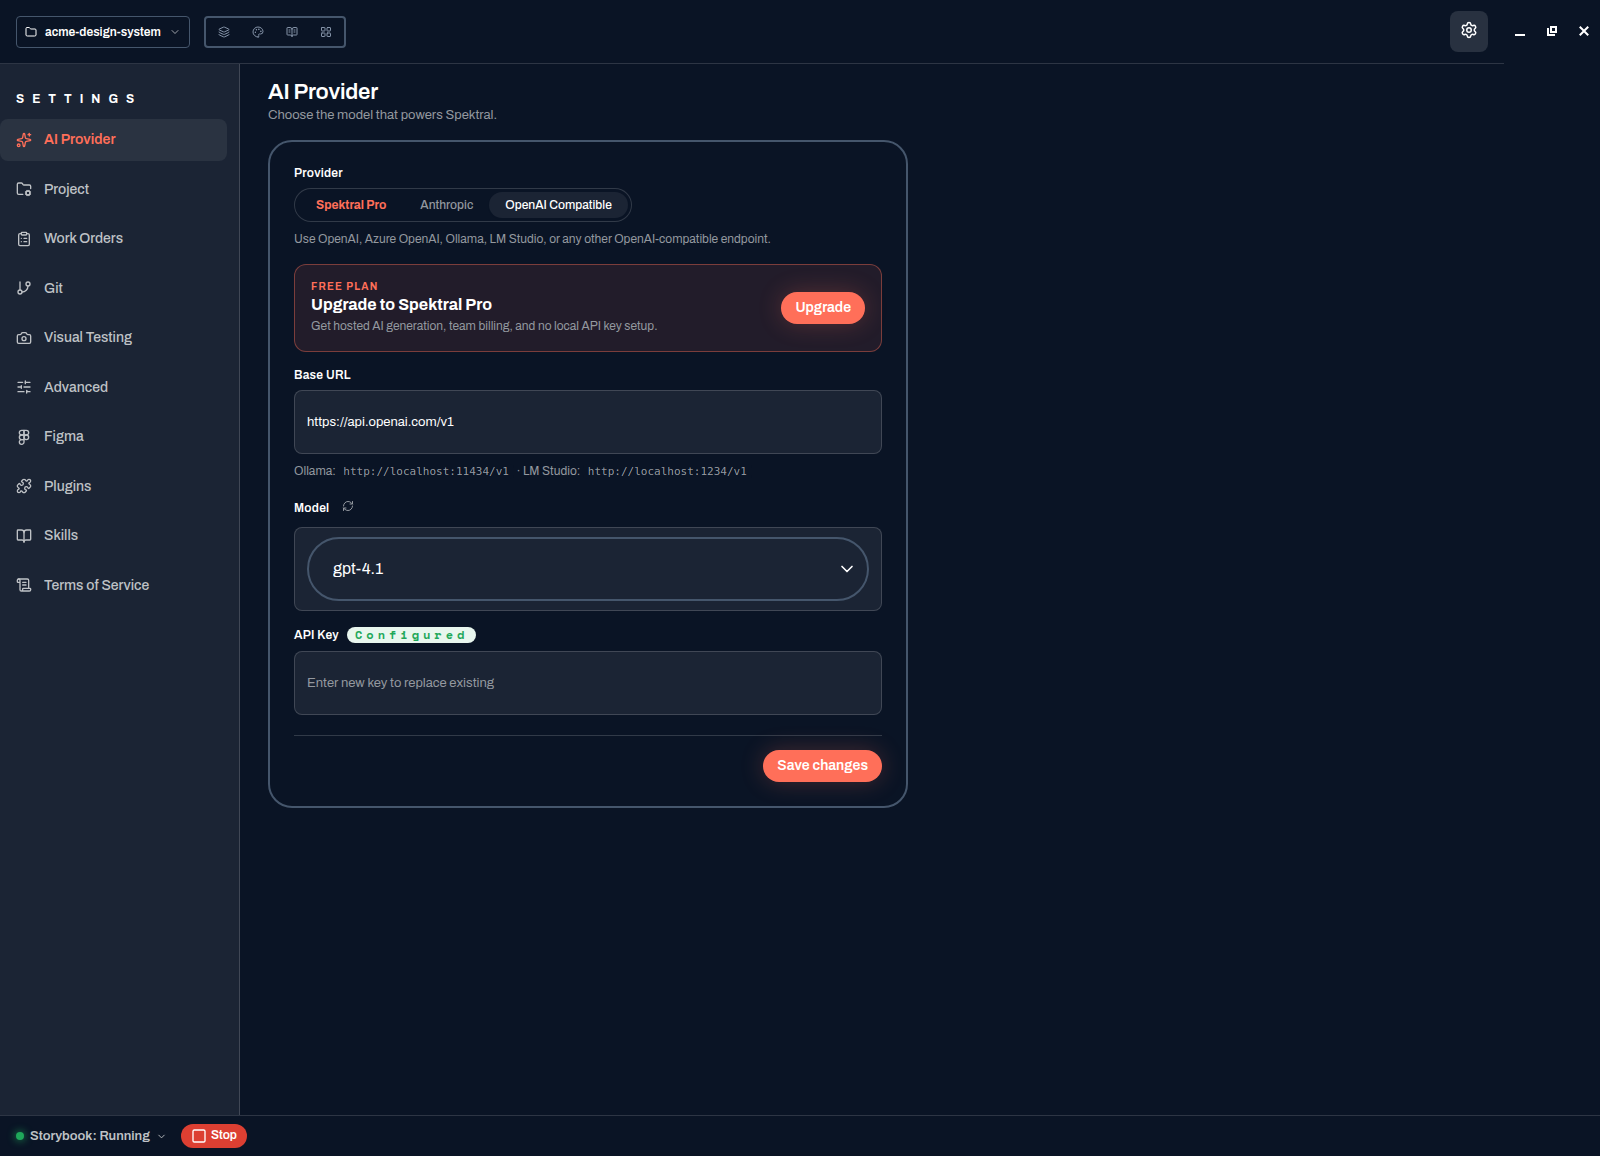
Changing your mind later
Press the gear in the top-right at any time. AI Provider is the same three choices, plus the base URL and model, so you can point Spektral at a local Ollama or LM Studio endpoint or swap models without starting over. The rest of Settings covers the project, Work Orders, Git, visual testing, Figma, plugins, and skills.
You land on the project chooser
Once generation is sorted, Spektral asks what to open.
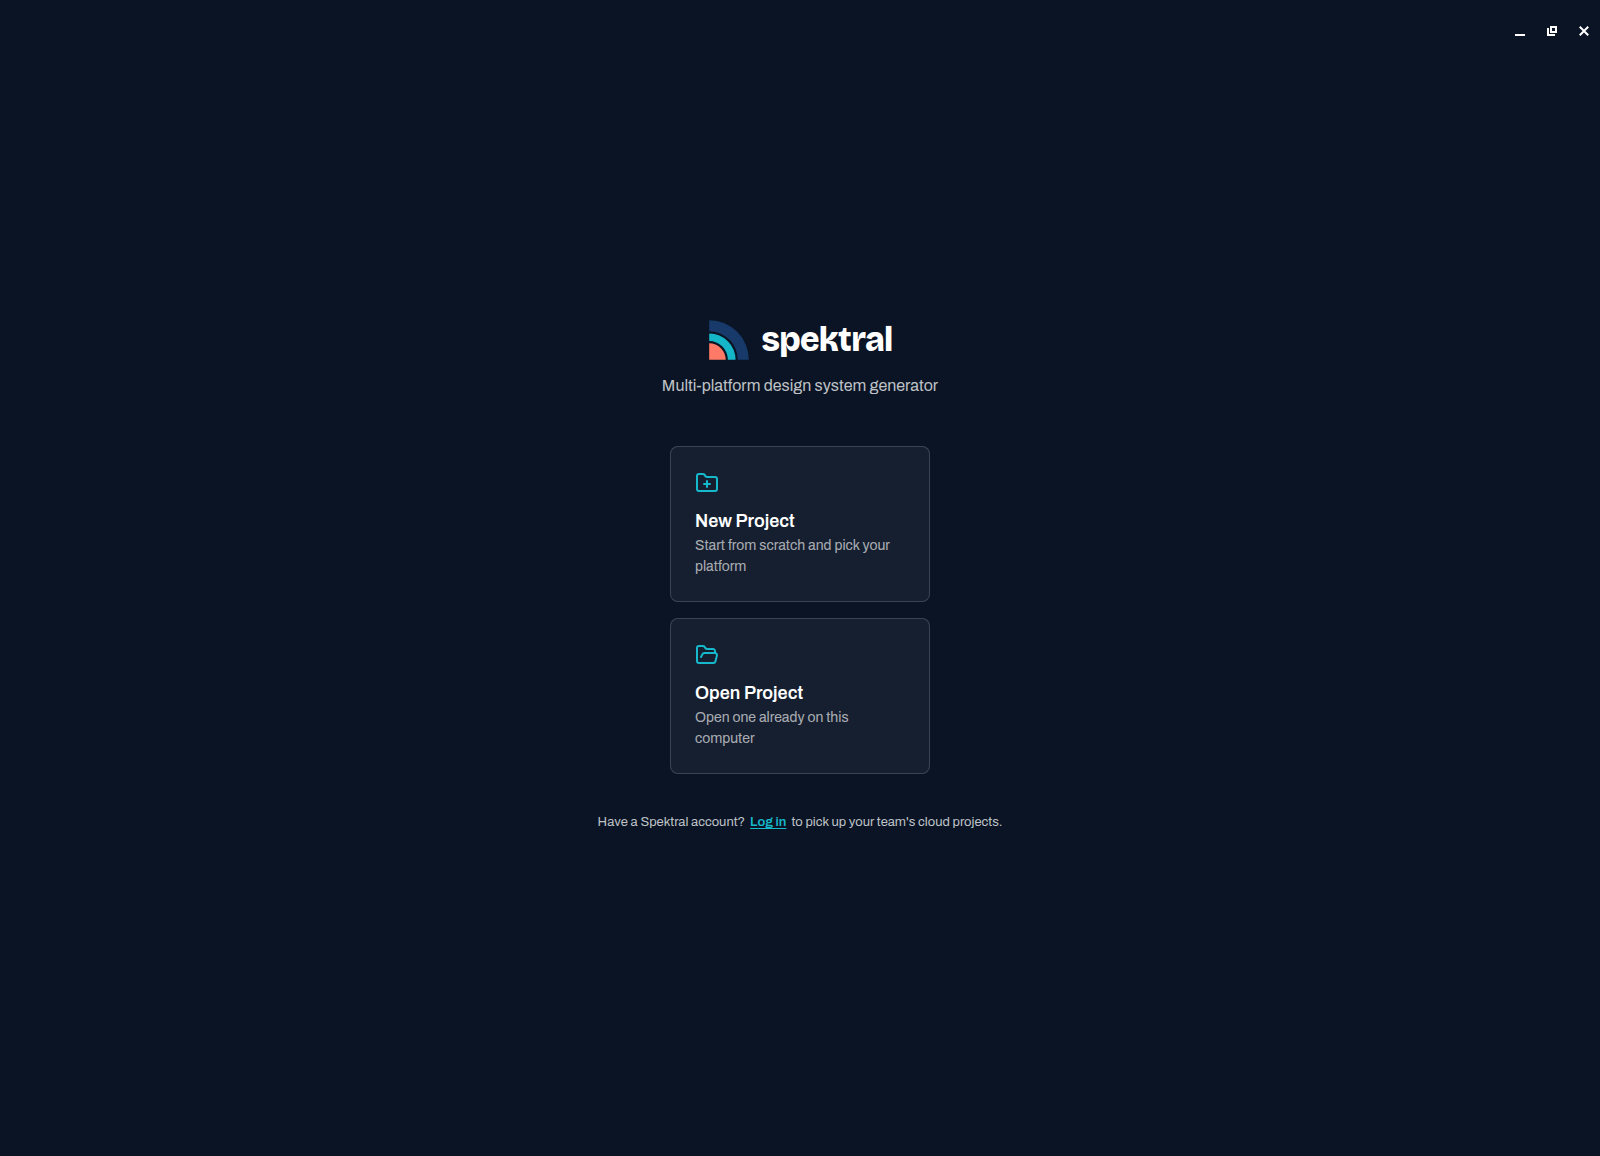
Take New Project next and you will have a working component library in a couple of minutes.